Activation
Check out the Troubleshooting / Common Issues section.
Refer to Unity's official licensing documentation for more details about Unity activation.
To run Unity in a CI/CD pipeline, you need to activate your license. For details about how the activation process works, refer to the following scripts:
In this guide, we will cover
- Activation methods for different license types.
- Setting up your Unity license in GitLab CI/CD.
Choosing the Right Activation Method
To activate Unity, select the method that matches your license type.
- If you're using the free version, follow the steps for a Personal License.
- If you're using a paid Unity subscription (Plus/Pro), see Professional License.
- If your organization has a license server, see License Server.
Personal License
Follow these steps if you are using the free version of Unity and do not have a serial from
a paid plan. However, note that Unity Personal licenses produce a “serial” token in the
.ulf file.
The activation process for Unity Personal licenses is as follows:
- Activate locally with Unity Hub on your machine and Locate the
.ulf(see the OS-specific paths). - Extract the serial from the
.ulffile. - Store serial and Unity credentials in GitLab’s CI/CD Variables:
UNITY_SERIAL(extracted from.ulf)UNITY_EMAILUNITY_PASSWORD
1. Setting Up Your Unity License
Install Unity Hub: Download and install Unity Hub on your local machine.
Log in to Unity Hub: Use the Unity account linked to your CI setup to log in. Ensure you're using the correct account to activate the intended license.
Activate Your License: Manually activate by navigating to:
Unity Hub>Preferences>Licensesand click theAddbutton- Select Get a free personal license.
Ensure File CreationEven if a license appears in Unity Hub, a
.ulffile may not have been created. To ensure the file is generated, make sure to click theAddbutton and proceed with the activation steps. Do not skip this step.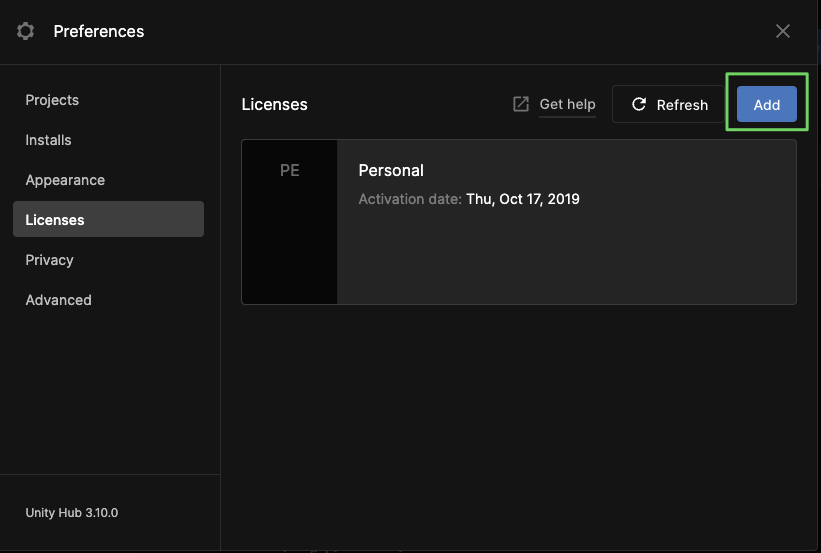
Locate the
.ulffile: Depending on your operating system, the Unity license file will be located in one of these paths:- Windows:
C:\ProgramData\Unity\Unity_lic.ulf - Mac:
/Library/Application Support/Unity/Unity_lic.ulf - Linux:
~/.local/share/unity3d/Unity/Unity_lic.ulf
- Windows:
If you have trouble locating the .ulf file, follow these steps:
- Check activation: Ensure you’ve logged into Unity Hub and completed the step "3. Activate Your License".
- Reveal hidden files: These folders may be hidden by default, so enable the option to view hidden files in your file explorer.
- Use any platform: Licenses are not tied to a specific Unity version or platform. You can
activate the license on any operating system, such as Windows, and use it for builds on another
platform, like Ubuntu. Simply retrieve the
.ulffile from the platform most convenient for you.
2. Extracting the Serial from a personal license
Extract your Unity serial from the
.ulffile:This command decodes the internal
DeveloperDatafield to reveal the serial used for activation (even for Personal).On macOS or Linux:
cat Unity_lic.ulf | grep DeveloperData | sed -E 's/.*Value="([^"]+)".*/\1/' | base64 --decodeOn Windows using Powershell:
Get-Content .\Unity_lic.ulf |
Select-String -Pattern 'DeveloperData' |
ForEach-Object {
 $b64 = $_ -replace '.*Value="([^"]+)".*', '$1'
 [System.Text.Encoding]::UTF8.GetString([System.Convert]::FromBase64String($b64))
}
The serial should look like this: XX-XXXX-XXXX-XXXX-XXXX-XXXX.
3. Storing the Serial in GitLab CI/CD
Add the extracted serial to your GitLab project’s CI/CD Variables:
UNITY_SERIAL: The serial extracted from the.ulffileUNITY_EMAIL: The email address associated with your Unity accountUNITY_PASSWORD: The password for your Unity account
Make sure you unchecked the "protected" checkbox for these variables if you want them to be available for all branches and merge requests.
Keep your extracted serial and credentials secure. Never commit them to version control or share them publicly.
You're all set! The pipeline will use these credentials to activate Unity automatically. 🎉
Professional License
If you have Unity Plus or Unity Pro, you have an official serial key from Unity subscriptions. For GitLab:
- Get your serial (format:
XX-XXXX-XXXX-XXXX-XXXX-XXXX). - Go to Settings → CI/CD → Variables in your GitLab project:
UNITY_SERIALUNITY_EMAILUNITY_PASSWORD
Make sure you unchecked the "protected" checkbox for these variables if you want them to be available for all branches and merge requests.
Keep your extracted serial and credentials secure. Never commit them to version control or share them publicly.
You're all set! The pipeline will use these credentials to activate Unity automatically. 🎉
License Server
If your organization uses a floating license server, you can supply a server URL with the
environment variable UNITY_LICENSING_SERVER in your GitLab variables. The pipeline (via
before_script.sh) automatically tries to acquire a floating license at the start of the job
and return it after. For example:
variables:
  UNITY_LICENSING_SERVER: 'ssl://your-license-server.company.com:443'
Make sure you unchecked the "protected" checkbox for these variables if you want them to be available for all branches and merge requests.
No need to set UNITY_EMAIL, UNITY_PASSWORD, or UNITY_SERIAL if you exclusively use the
license server method.
You're all set! The pipeline will use the server to activate Unity automatically. 🎉
Debugging activation Locally with Docker
To debug or confirm activation locally (instead of pushing every time), you can run:
UNITY_VERSION=2022.3.12f1
IMAGE=unityci/editor
IMAGE_VERSION=3
DOCKER_IMAGE="$IMAGE:$UNITY_VERSION-base-$IMAGE_VERSION"

docker run -it --rm \
  -e "[email protected]" \
  -e "UNITY_PASSWORD=example_password" \
  -e "UNITY_SERIAL=EXA-MPLE-SERI-ALKE-Y123" \
  -v "$(pwd):/root/project" \
  $DOCKER_IMAGE \
  bash

# Then inside the container, run:
xvfb-run --auto-servernum --server-args='-screen 0 640x480x24' \
  unity-editor \
  -logFile /dev/stdout \
  -batchmode \
  -nographics \
  -username "$UNITY_EMAIL" -password "$UNITY_PASSWORD" -serial "$UNITY_SERIAL"
If it finishes without errors, a .ulf should be located in
/root/.local/share/unity3d/Unity/Unity_lic.ulf. You can use or reference that file in your GitLab
environment.
Executing shell commands directly in your terminal can expose your credentials in your shell history. To avoid this, consider writing the commands to a shell script and executing the script instead.
Next Steps
Once your license is activated in GitLab CI, you can:
- Run Unit tests with the
testjob in your.gitlab-ci.yml. - Create Builds for multiple platforms (Windows, Linux, macOS, Android, iOS, WebGL).
- Deploy or publish artifacts (e.g. WebGL to GitLab Pages).
- Explore advanced usage (e.g., coverage reports, caching, license server expansions).