Github Actions
The Github actions runner application supports many different installation and configuration options. This guide covers on a basic setup that creates a single runner instance. Both manual and automated setup instructions are provided, skip to the bottom of the page for the automation script.
For more in-depth guidance please refer to the official documentation:
Manual Setup
- Log in to Github and navigate to the repo you would like to set up a
runner for and from the top menu of the repo's page, select the
settingstab

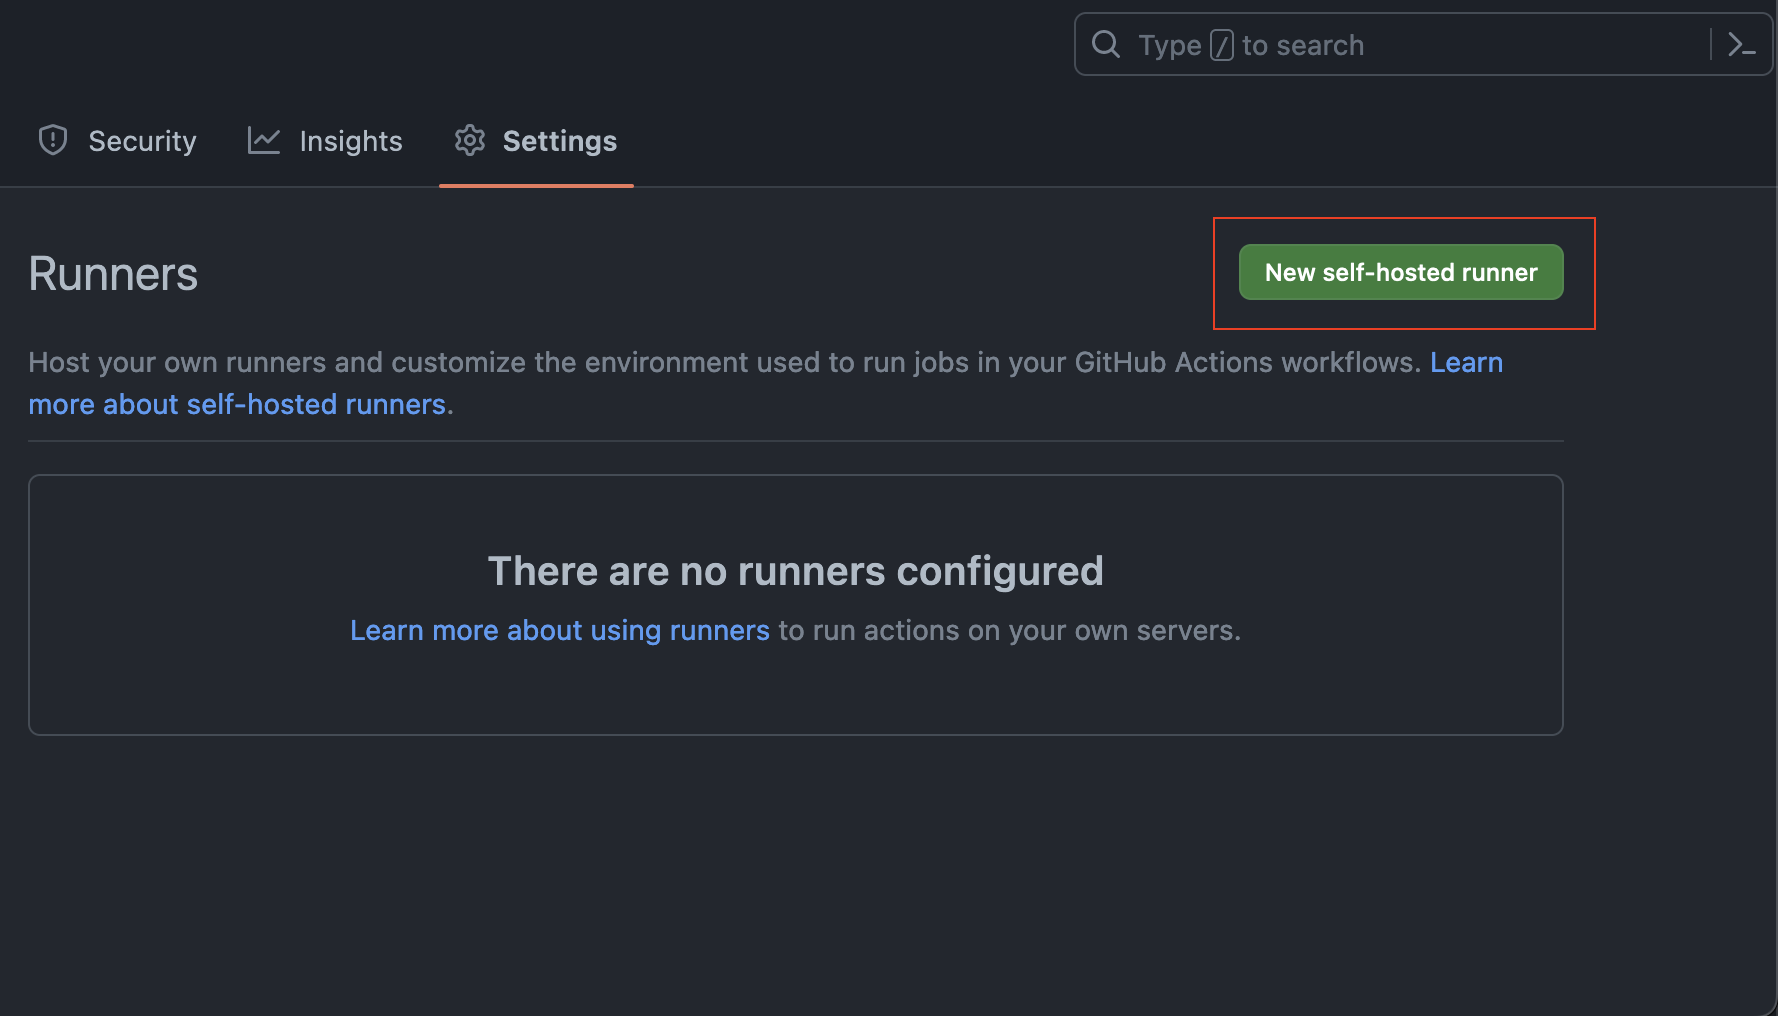
- From them menu on the left, expand the
Actionsmenu then select theRunnersoption

- Click the
New self-hosted runnerbutton to bring up the runner installation instructions.
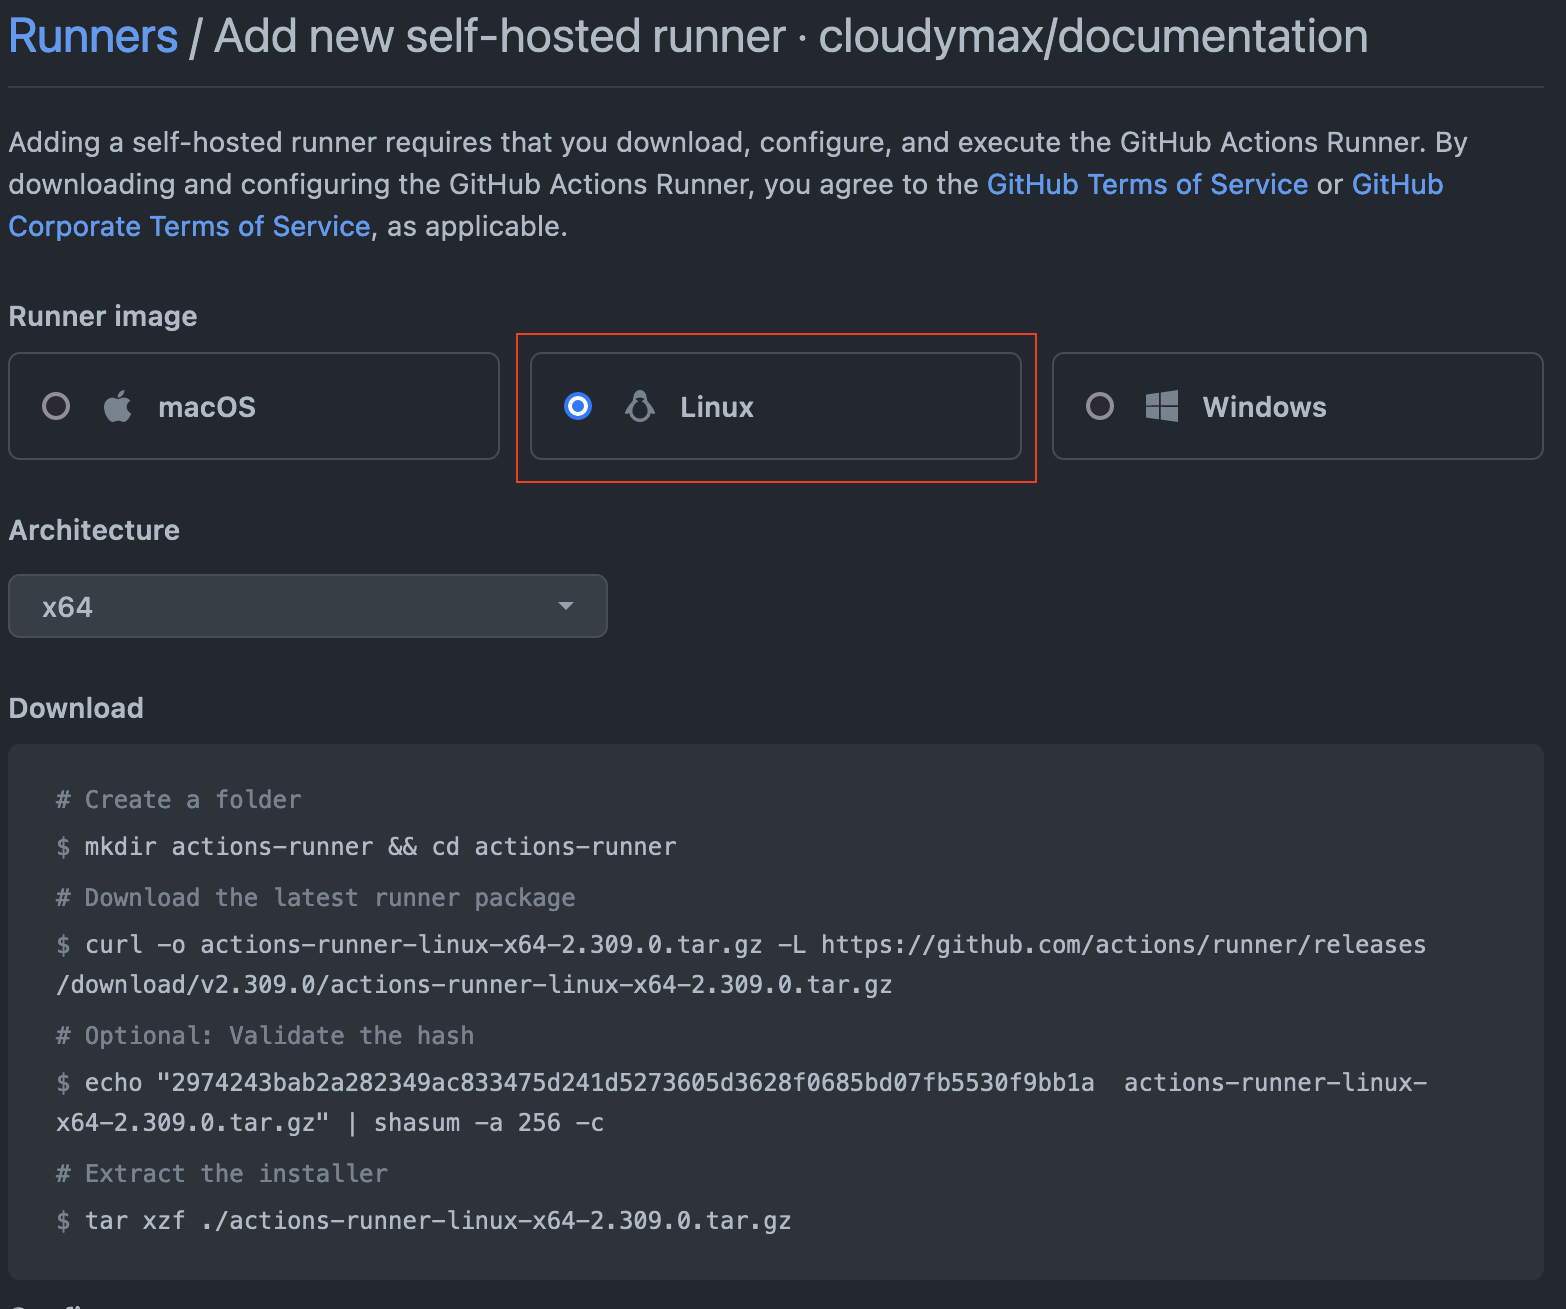
- Select the
Linuxrunner option, then follow the on-screen instructions to download, install, and configure the runner application.
Update your workflow file to use your self hosted runner by setting the
runs-onvaluetoself-hostedas shown in the example below.name: learn-github-actions
on: [push]
jobs:
check-bats-version:
runs-on: self-hosted
steps:
- uses: actions/checkout@v4
- uses: actions/setup-node@v3
with:
node-version: '14'
- run: npm install -g bats
- run: bats -v
Automated Setup
The following script will perform the same actions as described above automatically. This is usefull for those who would prefer ephemeral runners or to use a declarative workflow. You will need to provide your own access-token to the script as an input value.
Copy and paste the following int your terminal to create the script
/usr/bin/cat << 'EOF' > runner.sh
#!/bin/bash

# url for github api endpoint
base_api_url="https://api.github.com"

# Username or Org name
owner=$1

# Name of the repository to create a runner for
repo=$2

# Access token
token=$3

# Runner platform
runner_plat=linux

# Get a authorized token for your repo/org
export RUNNER_TOKEN=$(curl -s -X POST ${base_api_url}/repos/${owner}/${repo}/actions/runners/registration-token -H "accept: application/vnd.github.everest-preview+json" -H "authorization: token ${token}" | jq -r '.token')

# Find the latest version of the runner software
latest_version_label=$(curl -s -X GET 'https://api.github.com/repos/actions/runner/releases/latest' | jq -r '.tag_name')
latest_version=$(echo ${latest_version_label:1})

# Assemble the string-value for the runner application archive
runner_file="actions-runner-${runner_plat}-x64-${latest_version}.tar.gz"

# Assemble the download URL
runner_url="https://github.com/actions/runner/releases/download/${latest_version_label}/${runner_file}"

# Download and extract the archive
wget -O ${runner_file} ${runner_url}
tar xzf "./${runner_file}"

# Install and configure the application without prompting for user-input
./config.sh --url https://github.com/${owner}/${repo} --token ${RUNNER_TOKEN} --unattended

./svc.sh install
sudo ./svc.sh start
sudo ./svc.sh status
EOF
Run the script as follows:
bash ./runner.sh <github-username> <repo-name> <access-token>